15 KiB
Auto Scaling Group (ASG) with Elastic Load Balancer
What is an Auto Scaling Group?
An Auto Scaling Group (ASG) is an AWS service that automatically manages a fleet of EC2 instances, maintaining the number you specify at all times. When paired with an Elastic Load Balancer (ELB), the ASG registers its instances as targets in the load balancer's target group automatically — so every new instance spun up by the ASG is immediately eligible to receive traffic. The ELB continuously performs health checks on all registered instances and reports results back to the ASG; if an instance fails a health check, the ASG detects it, terminates the unhealthy instance, and launches a replacement — entirely without human intervention. This combination delivers high availability, self-healing infrastructure, and the ability to scale in or out based on demand.
Prerequisites: This lab assumes an Application Load Balancer (
ALB-ASG) and Target Group (ALB-ASG-TG) already exist. If you haven't created them yet, refer to the ALB README first.
Lab Overview
| Resource | Name / Value |
|---|---|
| Auto Scaling Group | ASG |
| Launch Template | ASG-launch-template |
| AMI | Amazon Linux 2023 (ami-0317b0f0a0144b137) |
| Instance Type | t3.micro |
| Security Group (instances) | launch-wizard-1 |
| Security Group (ALB) | SG-ASG |
| Load Balancer | ALB-ASG |
| Target Group | ALB-ASG-TG |
| Desired / Min / Max capacity | 2 / 1 / 4 |
| Availability Zones | ap-south-1a, ap-south-1b, ap-south-1c |
| Region | ap-south-1 (Mumbai) |
Video Demo
Step-by-Step Walkthrough
Step 1 — Open EC2 and Navigate to Auto Scaling Groups
Log in to the AWS Management Console. From the Recently visited services on Console Home, click EC2.

Inside the EC2 dashboard, locate the Resources panel and click Auto Scaling Groups.

The Auto Scaling Groups landing page explains how ASG works. Click Create Auto Scaling group to begin.

Step 2 — Create a Launch Template
A launch template is a reusable blueprint that tells the ASG exactly how to configure every EC2 instance it launches — OS, instance type, security group, and startup script — so you never have to configure machines manually again.
2a — Name the ASG and open the launch template wizard
In the Name field of the ASG wizard, enter ASG. Since no launch template exists yet, click Create a launch template to open the template wizard in a new tab.

2b — Name and describe the template
Enter the following details:
- Launch template name:
ASG-launch-template - Template version description:
A launch template for Auto Scaling Group - Auto Scaling guidance: check the box — Provide guidance to help me set up a template that I can use with EC2 Auto Scaling
Then scroll down.

2c — Choose AMI and instance type
Under Application and OS Images, click Quick Start, select Amazon Linux, and choose Amazon Linux 2023 AMI 2023.10 (Free tier eligible).

Under Instance type, open the dropdown and select t3.micro (Free tier eligible, 2 vCPU, 1 GiB Memory).

2d — Select security group, add user data, and create the template
Under Network settings, choose Select existing security group and select launch-wizard-1.

Scroll down and click Advanced details to expand it.

Scroll to the User data field and paste the following script. This script runs automatically the first time each instance boots, installing and starting a web server that displays the instance's private hostname — which is how you can confirm the load balancer is routing to different instances.
#!/bin/bash
# Use this for your user data (script from top to bottom)
# install httpd (Linux 2 version)
yum update -y
yum install -y httpd
systemctl start httpd
systemctl enable httpd
echo "<h1>Hello World from $(hostname -f)</h1>" > /var/www/html/index.html
| Command | Purpose |
|---|---|
yum update -y |
Updates all installed packages |
yum install -y httpd |
Installs Apache HTTP Server |
systemctl start httpd |
Starts the web server immediately |
systemctl enable httpd |
Ensures the web server starts on every reboot |
echo ... > /var/www/html/index.html |
Creates a page showing the instance's private hostname |
Click Create launch template.

Step 3 — Select the Launch Template and Configure the Network
Return to the ASG wizard tab. Open the Launch template dropdown and select ASG-launch-template.

The template summary appears, confirming the AMI, instance type (t3.micro), and security group. Click Next.

On the Choose instance launch options step, under Availability Zones and subnets, select all three availability zones:
- aps1-az1 (ap-south-1a)
- aps1-az2 (ap-south-1c)
- aps1-az3 (ap-south-1b)
Leave Availability Zone distribution set to Balanced best effort. Click Next.

Why select all AZs? Spreading instances across multiple Availability Zones means that if one AZ has an outage, your application keeps running on instances in the remaining zones.
Step 4 — Attach to the Existing Load Balancer
On the Integrate with other services step, under Load balancing, select Attach to an existing load balancer.
Under Select the load balancers to attach, choose Choose from your load balancer target groups. Click the target group dropdown — it shows ALB-ASG-TG | HTTP backed by the ALB-ASG load balancer. Select it.

Scroll down to the Health checks section. Tick Turn on Elastic Load Balancing health checks (marked Recommended). Leave the health check grace period at 300 seconds. Click Next.

Why enable ELB health checks? By default the ASG only uses EC2 health checks (is the instance running?). Enabling ELB health checks adds a second layer — the ASG will also replace instances that are running but failing to serve HTTP traffic.
Step 5 — Configure Group Size and Scaling
On the Configure group size and scaling step, set the capacity values:
| Setting | Value |
|---|---|
| Desired capacity | 2 |
| Min desired capacity | 1 |
| Max desired capacity | 4 |
Under Automatic scaling, leave No scaling policies selected — the group will maintain exactly the desired capacity at all times.
Under Instance maintenance policy, leave No policy selected.

Scroll down, review the additional settings (all defaults), and click Next.

On the Add notifications step, skip adding any SNS notifications and click Next.

On the Add tags step, skip adding tags and click Next.

Step 6 — Review and Create
The Review page summarises every setting. Verify:
- Auto Scaling group name:
ASG - Launch template:
ASG-launch-template(Default version) - Availability Zones: aps1-az1, aps1-az2, aps1-az3
Scroll through and confirm the load balancer integration and group size settings are correct.

Scroll to the bottom and click Create Auto Scaling group.

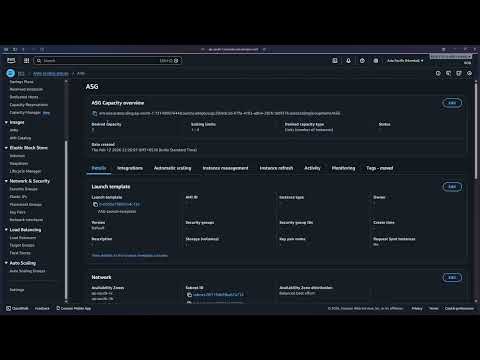
Step 7 — ASG Created — EC2 Instances Auto-Provisioned
The ASG is created. Navigate to the Activity tab. The Activity history shows two Successful launch events — the ASG immediately provisioned the desired 2 instances using the launch template.

Navigate to EC2 > Instances. Two t3.micro instances are in Running state — one in ap-south-1a, one in ap-south-1b.

Key point: You never clicked "Launch instance." The ASG read the launch template and provisioned both machines automatically as soon as it was created.
Step 8 — Test via the Load Balancer DNS
Navigate to EC2 > Load Balancers and select ALB-ASG. In the details panel, locate and copy the DNS name:
ALB-ASG-1425310447.ap-south-1.elb.amazonaws.com


Paste the DNS name into your browser's address bar and press Enter. You will see a page served by one of the ASG-managed instances:

Refresh the page. The ALB routes the request to another instance, and you may see a different hostname — confirming the load balancer is distributing traffic across the ASG's instances.

Step 9 — Test Auto-Healing
To verify the self-healing capability, manually terminate one of the running instances. Go to EC2 > Instances, select one of the ASG-managed instances, click Instance state > Terminate (delete) instance.

Switch to Auto Scaling groups > ASG > Instance management. The terminated instance appears with a health status of Unhealthy (Lifecycle: Terminating), while the others remain Healthy.

Within a few minutes, check the Activity tab. A new entry appears:
"An instance was launched in response to an unhealthy instance needing to be replaced."
The ASG detected the unhealthy instance via the ELB health check, terminated it, and launched a fresh replacement — all automatically.

Auto-healing in action: No manual intervention was needed. The ASG + ELB health check loop detected the failure and self-healed the fleet within minutes.
Step 10 — Cleanup
Delete resources in the following order to avoid dependency errors.
10a — Delete the Auto Scaling Group
In Auto Scaling groups, select ASG, click Actions > Delete. Type delete in the confirmation field and click Delete.


The ASG status changes to Deleting and the desired/min/max capacity drops to 0.

The Activity history shows both instances being terminated.

Important: Deleting the ASG automatically terminates all EC2 instances it manages. You do not need to terminate them separately.
Navigate to EC2 > Instances to confirm all instances are terminated.

10b — Delete the Load Balancer
In EC2 > Load Balancers, select ALB-ASG, click Actions > Delete load balancer and confirm. A green banner confirms: Successfully deleted load balancer: ALB-ASG.

10c — Delete the Target Group
In EC2 > Target Groups, select ALB-ASG-TG, click Actions > Delete and confirm.

10d — Delete the Security Group
In EC2 > Security Groups, select SG-ASG, click Actions > Delete security groups and confirm.

All resources from this lab have been deleted.
Key Concepts Learned
- Auto Scaling Group (ASG): Automatically maintains a desired number of EC2 instances. If an instance fails or is terminated, the ASG replaces it to keep the fleet at the desired count.
- Launch Template: A reusable configuration blueprint (AMI, instance type, security group, user data) used by the ASG to provision identical instances on demand — eliminating manual configuration.
- Desired / Min / Max Capacity: Defines the target fleet size (Desired), the floor (Min), and the ceiling (Max) the ASG will operate between.
- ELB Health Checks: When enabled, the ASG uses the load balancer's perspective of instance health (is the instance passing HTTP checks?) rather than just EC2 status (is the instance running?). This catches application-level failures.
- Auto-Healing: ASG automatically replaces any instance the ELB marks as unhealthy — no manual action required.
- Multi-AZ Deployment: Distributing instances across multiple Availability Zones ensures the application survives a single AZ failure.
- Instance Maintenance Policy: Controls whether the ASG launches a replacement before or after terminating an unhealthy instance during rebalancing events.