10 KiB
S3 Static Website Hosting
What is S3 Static Website Hosting?
Amazon S3 (Simple Storage Service) can host static websites directly from a bucket without requiring a traditional web server. When you enable static website hosting on an S3 bucket, AWS provides a unique endpoint URL that serves your HTML, CSS, JavaScript, and image files to anyone on the internet — as long as you configure the bucket for public read access and attach the appropriate bucket policy. This is a cost-effective, highly available, and scalable solution for hosting personal websites, single-page applications, documentation sites, landing pages, and portfolios. Unlike dynamic websites that require backend servers and databases, S3 static hosting is ideal for content that doesn't change based on user interactions or server-side processing.
Lab Overview
| Resource | Name / Value |
|---|---|
| S3 Bucket | your-unique-bucket-name |
| Bucket Policy | Allow public GetObject |
| Static Website Hosting | Enabled |
| Index Document | index.html |
| Region | ap-south-1 (or your preferred region) |
| Bucket Website Endpoint | http://<bucket-name>.s3-website-<region>.amazonaws.com |
Video Demo
Step-by-Step Walkthrough
Step 1 — Open AWS Console and Navigate to S3
Log in to the AWS Management Console and search for S3 in the services search bar, then click on S3 to open the S3 dashboard.

Step 2 — Create an S3 Bucket
2a — Click Create bucket
In the S3 dashboard, click Create bucket to begin the bucket creation wizard.

2b — Enter a unique bucket name
Enter a globally unique bucket name. Bucket names must be unique across all AWS accounts worldwide and must follow DNS naming conventions (lowercase letters, numbers, and hyphens only).

2c — Uncheck "Block all public access"
Scroll down to the Block Public Access settings section and uncheck "Block all public access". For static website hosting to work, your bucket must allow public read access to its objects.
⚠️ Important: Unchecking this setting means anyone with the URL can access files in this bucket. Only use this for content you intend to make publicly available.

2d — Acknowledge the warning and create the bucket
Check the acknowledgment box confirming you understand the bucket will be public, then click Create bucket at the bottom of the page.

Step 3 — Upload Website Files
3a — Open the bucket
The bucket is created successfully. Click on the bucket name to open it and view its contents.

3b — Click Upload
Inside the bucket, click the Upload button to open the file upload wizard.

3c — Add files
Click Add files or Add folder and select the static website files from your local machine (HTML, CSS, JavaScript, images, etc.).

3d — Upload the files
After selecting your files, scroll down and click Upload to transfer them to the S3 bucket.

Step 4 — Enable Static Website Hosting
4a — Navigate to Properties tab
Click on the Properties tab at the top of the bucket page.

4b — Find Static website hosting section
Scroll down to the Static website hosting section at the bottom of the Properties page.

4c — Enable static website hosting
Click Edit, then select Enable. Choose Host a static website as the hosting type, and enter index.html as the Index document (the default page visitors see when they access your site).

4d — Save changes
Scroll down and click Save changes to apply the static website hosting configuration.

Step 5 — Configure Bucket Policy
5a — Navigate to Permissions and edit bucket policy
Click the Permissions tab, scroll down to Bucket policy, and click Edit.

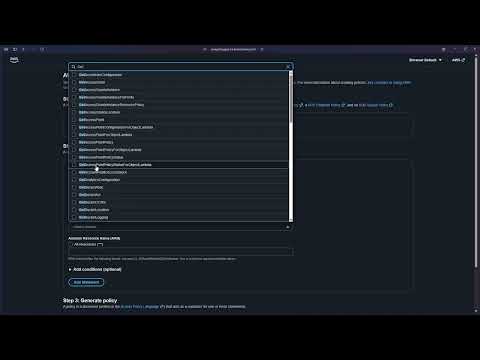
5b — Add a statement or use Policy generator
Click Add statement or Policy generator to create a new bucket policy. The policy generator helps you build the JSON policy without writing it manually.

Step 6 — Generate and Apply the Bucket Policy
6a — Open AWS Policy Generator
If using the AWS Policy Generator, you'll see a form. Configure it as follows to allow public read access to all objects in the bucket.

Policy Settings:
| Field | Value |
|---|---|
| Effect | Allow |
| Principal | * (anyone) |
| Actions | GetObject |
| ARN | arn:aws:s3:::your-bucket-name/* (replace with your bucket name and add /* at the end) |
6b — Add statement and generate policy
After entering the settings above, click Add Statement, then click Generate Policy.

6c — Copy the generated policy
The policy generator will output a JSON policy. Click Copy to copy the entire policy to your clipboard.

Sample Bucket Policy:
{
  "Version": "2012-10-17",
  "Statement": [
    {
      "Sid": "PublicReadGetObject",
      "Effect": "Allow",
      "Principal": "*",
      "Action": "s3:GetObject",
      "Resource": "arn:aws:s3:::your-bucket-name/*"
    }
  ]
}
Note: Replace
your-bucket-namewith your actual bucket name.
6d — Paste the policy and save changes
Return to the bucket policy editor, paste the policy JSON, and click Save changes.

6e — Bucket policy created successfully
You'll see a confirmation that the bucket policy has been successfully applied.

Step 7 — Access Your Website
7a — Return to Properties tab
Click the Properties tab again.

7b — Copy the bucket website endpoint
Scroll down to the Static website hosting section and copy the Bucket website endpoint URL.

7c — Open the website in your browser
Paste the endpoint URL into your browser's address bar and press Enter. Your static website is now live and publicly accessible! 🎉

Step 8 — Clean Up Resources (Empty the Bucket)
8a — Empty the bucket
To delete a bucket, you must first empty it. Select the bucket (or open it) and click Empty.

8b — Confirm deletion of objects
Type permanently delete in the confirmation field and click Delete objects.

Step 9 — Delete the S3 Bucket
9a — Select the bucket and click Delete
After emptying the bucket, select it from the S3 dashboard and click Delete.

9b — Confirm bucket deletion
Type the bucket name exactly as shown to confirm permanent deletion, then click Delete bucket.

9c — Bucket deleted successfully
The bucket and all its configurations are now permanently deleted.

Key Points to Remember
| Point | Details |
|---|---|
| Bucket names must be globally unique | No two buckets can have the same name across all AWS accounts worldwide |
| Public access is required | Static website hosting requires public read access via bucket policy |
| Bucket policy syntax | Must allow s3:GetObject action for Principal: "*" on Resource: "arn:aws:s3:::bucket-name/*" |
| Index document | Always specify index.html or your custom default page |
| Endpoint URL format | http://<bucket-name>.s3-website-<region>.amazonaws.com |
| HTTPS not supported by default | Use Amazon CloudFront for HTTPS and custom domains |
| Cost efficiency | Free tier includes 5GB storage, 20,000 GET requests, and 2,000 PUT requests per month (first 12 months) |
| Always clean up | Delete buckets and objects when no longer needed to avoid charges |
Use Cases
- 📄 Personal websites and blogs
- 🚀 Single-page applications (SPAs)
- 📚 Documentation sites
- 🎨 Portfolio websites
- 📱 Landing pages
- 🧪 Prototype hosting and demos